There is a lot of misinformation on the internet, about the K13 exhaust, not fitting the K12's. I did my own research, and found a couple of threads about a rider from the Netherlands who swapped out the K13 can, to his K12, with no difficulty. The question was raised as to why would someone do this swap? Well, for several reasons! The K13 can is infinitely better looking than the giant K12 can. I have heard the K12 can called a 'howitzer' a 'bazooka' and worst a 'rhino dildo'! Unfortunately, all three are accurate descriptions. The K12 can is also more than twice as heavy as the K13. The K13 just plain sounds better! The stock K13 uses the motorized flapper valve to control sound. Without the valve, the K13 can has a nice deep throaty rumble, vs. the K12's whisper quiet, silent exhaust note. Most riders like a bit of rumble, and aural feedback, from their exhaust, I know I do. With the stock K12 exhaust note, I felt that I was missing one of my riding 'senses', not being able to hear the engine, properly. The last reason for the swap is the cost. A decent slip on can costs $800 minimum. My choice for the best slip on is the K13 Akrapovic can, which sells for the reasonable sum of $1400!!? Out of the question! So I went for the K13 'upgrade' instead.
A BMW Superbike forum member here gave me a good deal on his very lightly used exhaust can, to begin my project. Removing the can is remarkably easy! First you have to remove the heat shield, which on the K12 is only one single bolt, and two slide-in tabs. Next, undo the band clamp that holds the can to the header. It does not have to be removed, just loosened enough to slide it back, off of the exhaust can flange.
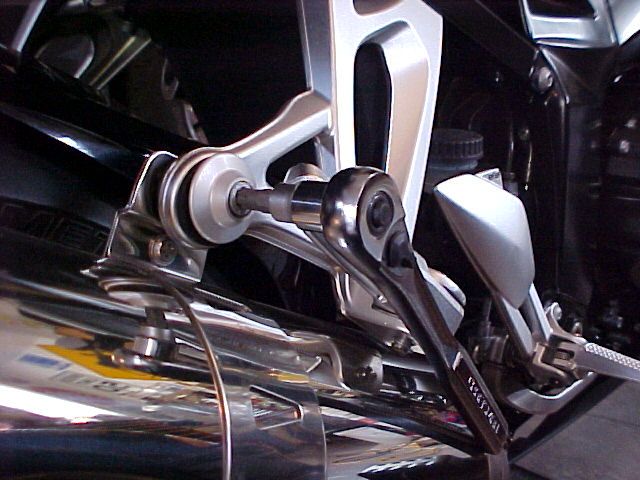
Then the bolt that holds the can to the rear foot peg can be undone.
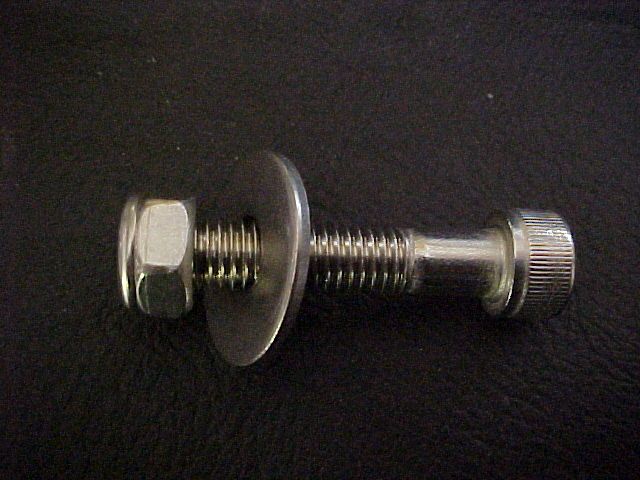
Thats it, now the can is just hanging in place and can be removed. Be careful! The stock K12 can is very heavy! lol You will need an M8 bolt to attach the K13 can to your K12. The K12 howitzer has a captured nut, in the clamp, the K13 uses a flanged nut to hold the can on. I opted for an entire bolt/nut/washer in stainless, as I did not think that the OE bolt would be long enoough. FYI, the K13 uses the same short length bolt to hold the stock can in place.
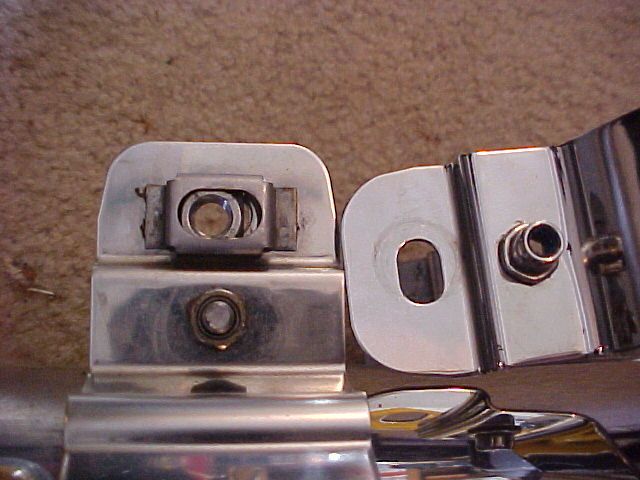
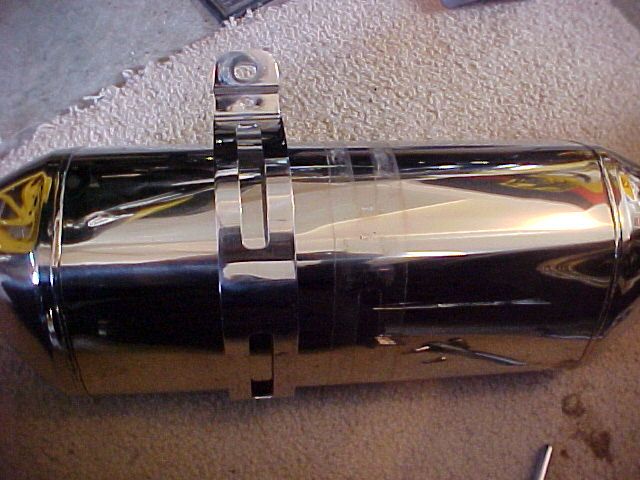
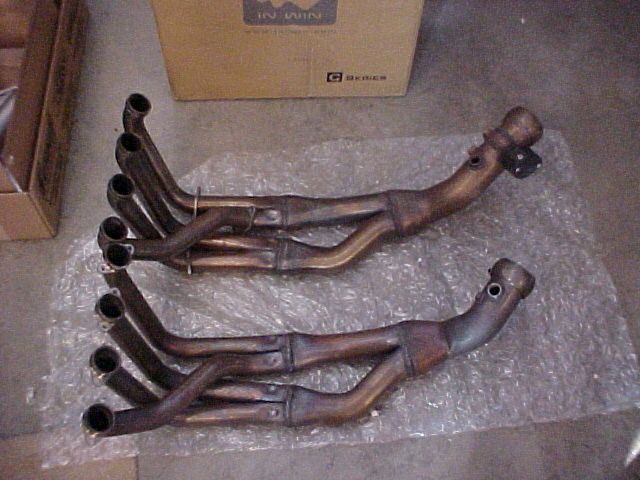
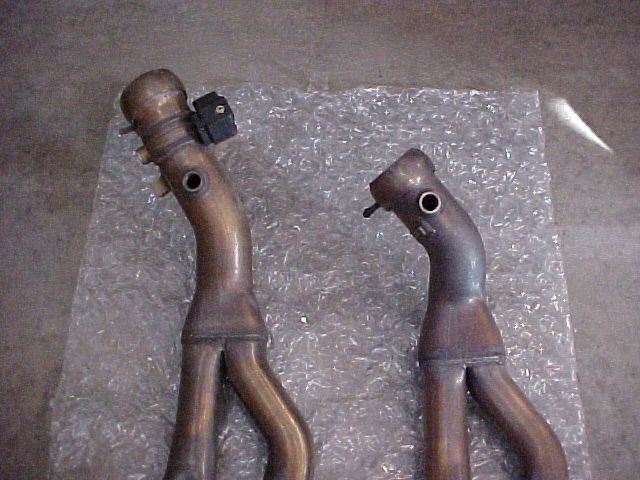
The clamp/strap that holds the K13 can on, will have to be moved rearward, nearly 3". The difference is that the K12 header is 70mm shorter than the K13 piece. The extra length is to accomodate the servo controlled flap and housing. The housing covers a strong spring, which holds the flap open. The servo motor pulls the cable, closing the flap at idle and part throttle positions, i assume. This extra length is well-documented, and why internet experts make the incorrect assumption that the K13 can will not retrofit on the K12.
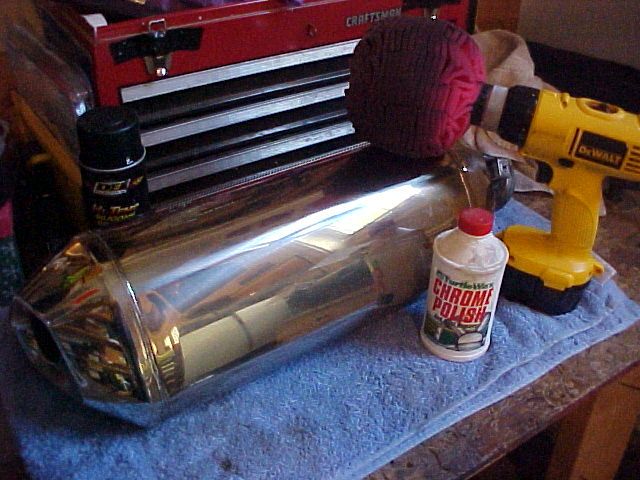
As you can see, there is a visible witness mark, where the strap used to be, from dirt, chrome polish, rubbing etc. I took my Mother's Power Ball and chrome polish to my new can, to remove these marks. Luckily, they came off easily, from the front, visible side, not so much from the backside. Probably because the front is generally kept nice and clean and polished up, the rear, not so much.
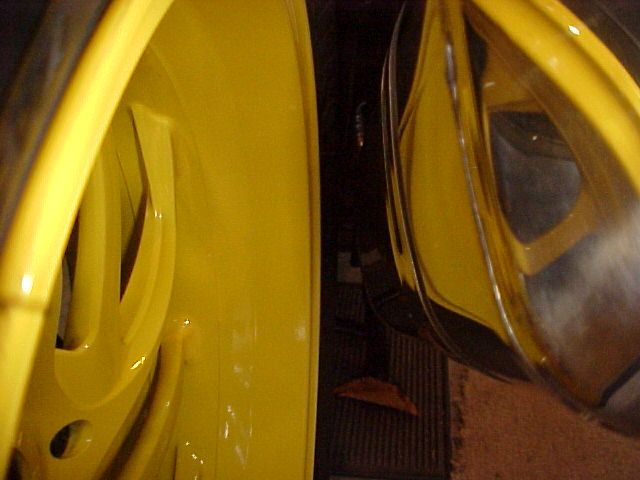
Next, I fitted the can in place, to check for clearance. I was a bit concerned to see only about 5/8" gap between the can and tire!
So I put the K12 bazooka back in place, for a reference. I was delighted to see that the stock pipe had the same, narrow gap! So no problem there. Finally I just bolted on the band clamp, and my new stainless bolt/lock nut/washer assembly, and checked my work:
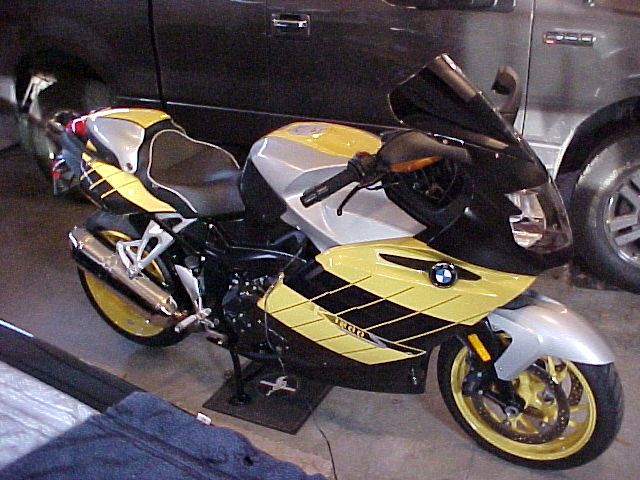
The K13 can sits a bit forward, to my eye. Probably just because I am used to the look of the K13 can, in the stock location, 70mm further back. It does look very modern, with a smallish can, mounted forward on the bike. Think new Ninja ZX14, and you get the idea. I am not sure if I am going to leave it this way, we'll see. It sounds fantastic, BTW! It has a nice throaty, deep rumble, reminescent of an aftermarket can. Probably due to the elimination of the K13 flapper valve.
Bottom line: The K13 Exhaust can is a direct fit replacement/upgrade for the K12!!!
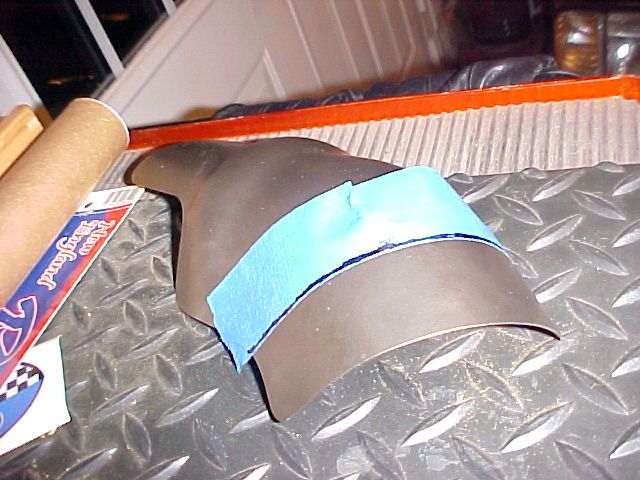
The last modification for the K13 can retrofit to the K12, is that you will have to trim your factory heat shield, by about 1.5", to fit. The shield will then bolt right on, and the tabs will slide back into place. This provides a nice, factory appearance. My shield is not mounted, in the previous pics, because I want to use a friends cut-off wheel to get a perfect straight cut. All I have on hand is a hack saw, which would provide a hack job, I'm sure! Here is a pic of the shield, with the cut line, marked off:
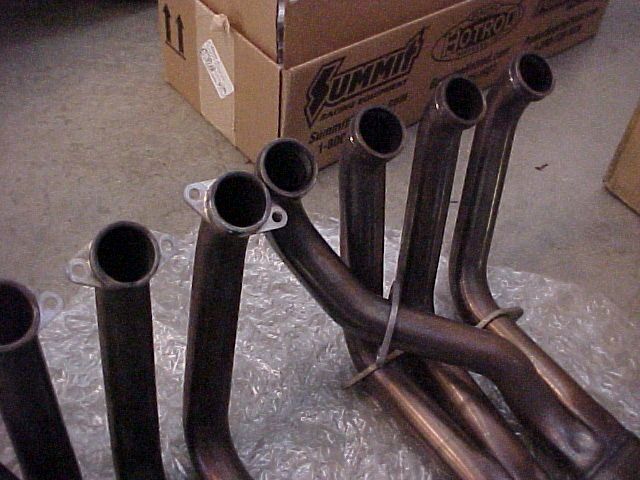
This didn't take too long, for an update to this mod! I decided that I could not live with the appearance of the K13 can, mounted so far forward on my K12. The can just didn't fill the space, visually, and it looked bad, to my eye. I also am not a fan of the modern look of a super small can, mounted low and forward on a sport bike. I despise that look, actually. I am more traditional and old school, I like a proper full-sized muffler, that fills the space, and dumps the exhaust to the rear of the bike. With that in mind, I decided that I needed the K13 headers to go with my K13 canister, to move the exhaust the extra 70mm rearward. That is almost 3" -- a lot! So I was able to purchase the header from the same BMW Superbike's forum member, who gave me a great deal. Once you see the headers, side by side, you can really visualize the differences:
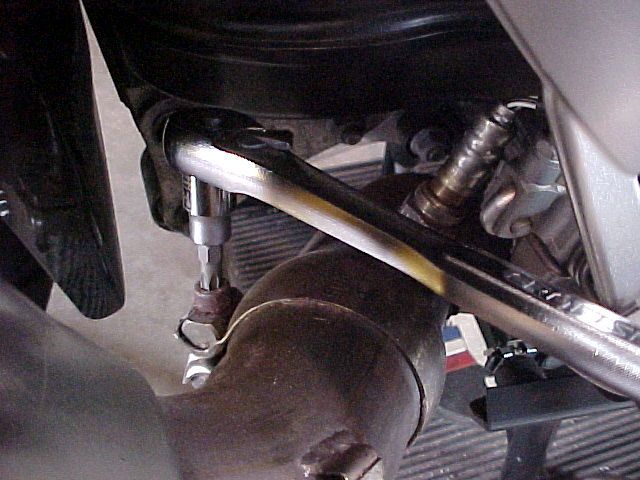
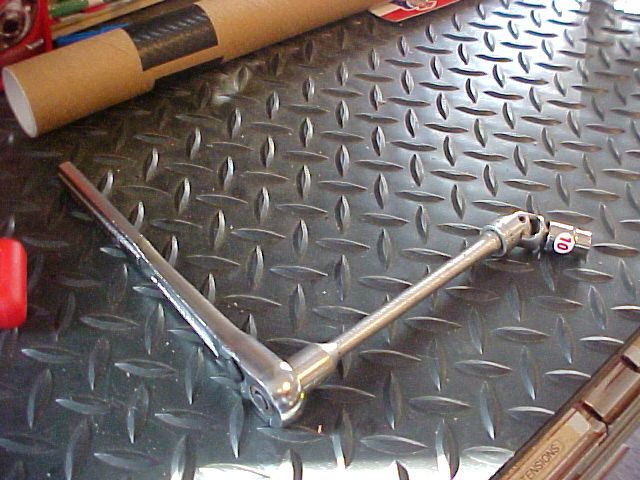
I elected to leave the K13 exhaust flapper in place. Removing it, would have been a chore, possibly damaging the pipe, and then there would be holes to be filled, either welded shut or possibly filled with bolts. The flapper valve is held open with a powerful spring, mounted on the side, in a small plastic case. I just disconnected the cable, actually cutting it, so that I could re-use the pass through nut, that fills the hole in the flapper-spring casing. Removing the stock header isn't that difficult, but it is a bit fiddly, and you are working on your back, unless you have a lift! I only removed my lower fairing, in one piece, 5 screws per side and the entire assembly slips off. To get the 8 nuts that hold the headers on, you will need a 10mm 12 point socket, an extension and a universal, will be your best friend. Realistically, this is the only way to access the center-most nuts:
The Header bolts only reguire 22 ft lbs of torque, hard to measure with the extension and universal, I just made sure that my bolts were well-tightened. The bolts appear to be made out of a soft brass or similar, so great care is recommended, here!
The K13 header has loose flanges, as opposed to the fixed ones on the K12 stocker. I am not sure why they did this, I assume it was for ease of assembly, in the factory. I never had any issues with the K12's fixed flange, but I don't have to bolt on hundreds a day!!
Overall, a pretty easy swap, and the K13 parts are direct bolt on, and everything fits, no problem.
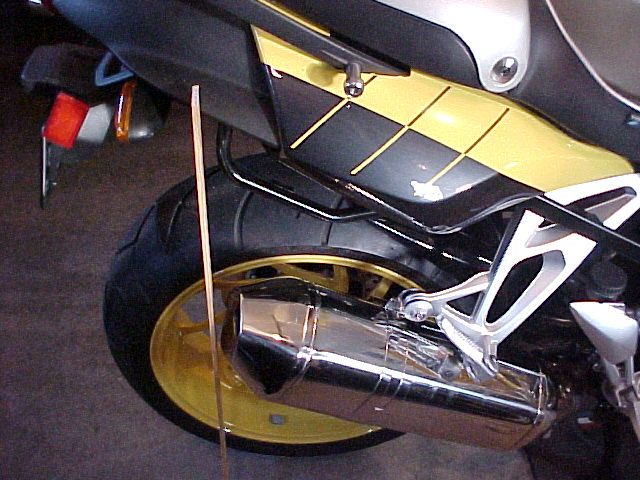
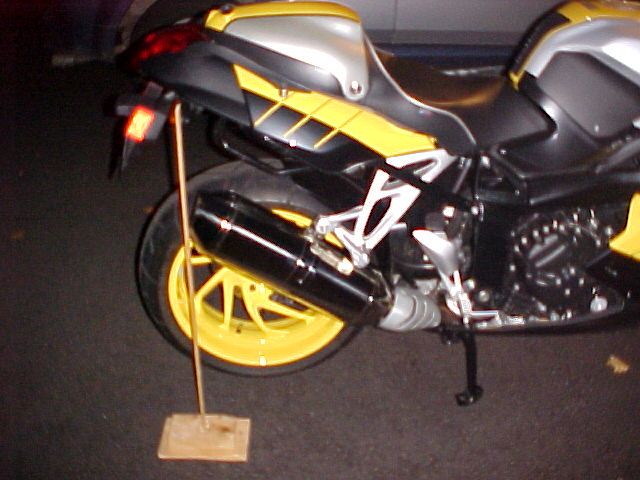
Here are a couple of pics, with the exhaust mounted. I used the wooden slat, so that a visual line can be seen, as to where the rear of the can is in relation to the bike itself. First is with the factory K12 header:
Now with the full K13 header and can:
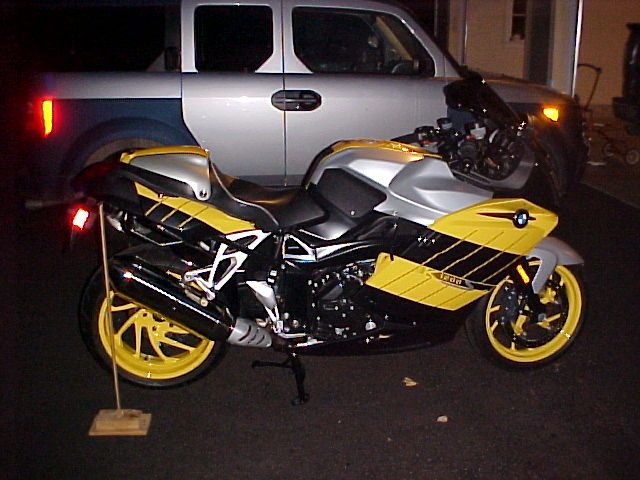
Now a couple of pics of the finished product, full K13 exhaust and heat shield, which the seller graciously included in the deal!
You can also see, from the K13 can's relation to the wheel, that it is further angled upward, and toward the rear of the bike. It just looks better, as it was designed by BMW, in my opinion.
I think it looks great! Really helps to update the looks of the K12. Any exhaust canister, aftermarket or K13, is a huge upgrade over the stock Howitzer! With the K13 header in place, the sound is unchanged, to my ear. The flapper valve is held open, so you are getting the full K13 can, wide open, at all times. I am not sure if the added 70mm length will alter the HP characteristics of the K1200. For street driving, i believe that you would never notice. In a race application, I know that adding and subtracting length to the exhaust header can make noticeable differences. I am not going to spend any time worrying about trace amounts of HP and torque gained or lost, lol!!
Do you have a movie with the sound of it? I might go for same project...
ReplyDeleteThis comment has been removed by the author.
ReplyDeleteNice job Jeffry !
ReplyDeleteYour explanation was clear, and now I have no doubts about this modification.
Thanks
Do you still have the modified K1200S heat shield lying around by any chance? I put a K1300S muffler on my k1200S and really don't want to cut the original just in case I decide to go back to stock. BTW thanks for posting this made my decision to change to a K1300S muffler easy, I like the shortie look.
ReplyDeleteI never ended up modifying the K1200 heat shield. I switched over to the K1300 headers, immediately, and used the K1300 exhaust shield. Then, after just a few months, I ended up upgrading to the BMW/Akrapovic muffler with the carbon fiber heat shield. I will never use the K1200 heat shield, if you would like to make me an offer?
ReplyDeleteHi Jeffrey. I realize your original post dates back to 2012 but thanks to it I was able to confidently buy a K1300s can to replace the damaged one on my K1200s and it went like a charm. It took minutes to do and the only modification needed was to cut a notch in the the heat shield which was a breeze since it's made of aluminium. It looks great (to my taste at least), it sounds great (slightly louder than the original one but not annoyingly so and with a deeper tone like you said). I didn't see any significant change in the power delivery, certainly no decrease, maybe a slight increase in the lower revs.
ReplyDeleteGlad that my blog was able to help you out! There is not a lot of information out there, on this swap, but it is very easily do-able! Congrats, and ride safe.
DeleteHi Jeffry
ReplyDeleteSo you have just cut the cable to to the Exhaust valve? I want the valve open fullt time as well but I'm a bit scared to cut it? What abliut the loose end? Does it come up as a fault?
Unplug the cable, it does not need to be cut. You just eliminate it, in other words.
DeleteI have just bought a full k1300 system for my 2008 k1200s and panicked as it has the flapper valve. Great post and put my mind at rest and the 1300 can looks alot better.. Does the flapper valve stay fully open when u cut the cable?
ReplyDeleteYes, a strong spring holds the valve fully open. If it were engaged, the motor moves the valve to partially closed etc. Fully open is the default. You can completely eliminate the wiring. It's been a long time, but I think you can just unplug it? Or cut it if you have to, it really doesn't matter. Easy mod.
ReplyDeleteJust fitted the system and it's a perfect fit. Just took the cable off and left the nuts on and refitted the cover. Great upgrade and thanks for a very informative post. The end can looks better as well and didnt need to cut the heat shield. Just radiator to sort now.
ReplyDelete